Plug Construction Guide
Share
Introduction

Photo credit IStock Photo.
The first step in the fiberglass mold-building process is to create a plug. A plug is the form which is to be duplicated and is usually a representation of the finished part. This can be an actual part or a mock-up of a part. When planning for the plug and mold, many factors must be taken into consideration, especially surface finish, draft angles, undercuts, and method of production. A composite mold that is going to be used for vacuum bagging, vacuum infusion or closed-molding processes will require large flanges.
These large flanges will allow for the attachment of the bagging materials. Parts that are undercut or have negative draft will need to be done in two-part molds in order for them to be extracted from the mold. Many factors will affect your decision regarding what materials to use during this process. Typically, polyester resin is used during the fabrication of a fiberglass mold. Our #77 Polyester Molding Resin is an ideal option for inexpensive mold making.
Selecting reinforcement materials is also very important. A combination of #250 Chopped Strand Mat and #223 Woven Roving, along with the use of a lightweight surfacing fabric, will generally create a sturdy, durable mold. #254 20 oz. Tooling Fabric is also a popular option for mold building.
One of the primary keys to success in mold construction is proper preparation of the plug, which is the "original" used to create the female mold. Any imperfections in the plug surface will be transferred to the mold, and then to future parts made from that mold. The plug needs to have a finish AT LEAST as good as the parts you wish to produce.
 Photo credit IStock Photo.
The preferable surface finish for the plug would be a Class "A" finish, which means it would be a polished, high-luster finish, free from any porosity, scratches, or imperfections. In order to achieve an acceptable mold surface and a long mold life, it is far more effective to remove defects from the plug surface than to attempt to remove defects from the mold surface or from all subsequent parts created from the mold.
Creating an Original Plug
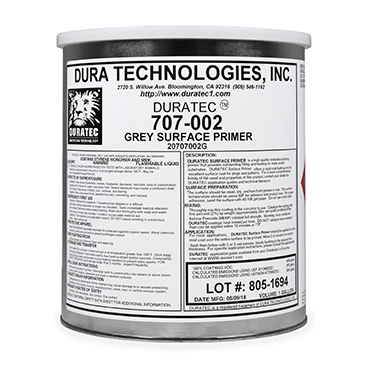
When beginning the process of creating an original plug, you must first determine the type of material that will be used. Plugs can be created from a variety of materials, as long as they are dimensionally stable. These materials commonly include wood, MDF, clay, SMC, foam and balsa. If the plug is to be made from a porous material such as wood or foam, the surface must be sealed with a resin or primer. #1041 Duratec Gray Surfacing Primer is ideal for this application and will be discussed later in this article. Plugs need to have a slight taper so that the mold can be easily removed. Typically, a larger plug will require more rigid and reinforced materials.
While many options exist for material selection, the most common choice for plug creation is foam. It is easily shaped, cost-effective and readily available. Fibre Glast has several options for your plug building needs including #440-C/441-C/442-C/443-C 2 Lb. Polyisocyanurate Foam Sheets, #448-D 6 Lb. Polyisocyanurate Foam Sheets, #445-A Six Foot Polyisocyanurate Foam Blocks. Polyisocyanurate foam has been a favorite material of pattern builders for years. You can cut, carve, sand, and sculpt nearly any shape. Although this foam can be easily CNC machined, it should not be hot-wired. Professional results can be achieved by using a variety of hand tools to saw, carve, plane, and smooth out your shape. Polyisocyanurate sheets can be glued together with General Purpose Spray Adhesive to form thicker blocks for shaping functional, moldless parts.

Another option for foam plug material is mix and pour foam. We offer two densities of mix and pour foams- #25/326-A 2 Lb. Polyurethane Mix and Pour Foam and #625/626-A 6 Lb. Polyurethane Mix and Pour Foam . Unlike polyester and polystyrene foams, polyurethane foam is compatible with polyester and epoxy resin systems. Due to its small cell structure, our mix & pour foam is frequently used to make detailed plugs and sculptures.
An important consideration when choosing the plug material is compatibility with the resin system you'll be using. Polystyrene and Styrofoam materials are not compatible with polyester resin. When using polystyrene (or Styrofoam), you must coat your plug with #1042-A Duratec Styroshield Primer. StyroShield contains microspheres that, when cured, insulate and protect polystyrene foam from the chemicals in polyester-based laminating resins and gel coat.
Once your shape is formed, layers of reinforcement can be added to protect and strengthen your plug. We recommend a lightweight reinforcement fabric such as #262 4 oz Fiberglass Fabric or #259 6 oz Fiberglass Fabric. #4100/264-A Polyester Fairing Compound and #4116/264-A Lightweight Polyester Cosmetic Filler should then be used to smooth and shape the external surface of the part. Both of these materials are easy to mix, have excellent adhesive qualities and can be sanded to a final finish, ready to prime.
After the plug has been properly shaped and sanded, finish the plug with a high quality surfacing primer, such as #1041 Duratec Gray Surfacing Primer. This is the best choice for coating your plug. The unique air-cure technology allows fast cure even with thin coats. It is a polyester based primer which has numerous advantages over all the products used in the past. First, it can be sprayed through conventional automotive type siphon or HVLP guns which offer the best control and delivery of any system on the market. The more evenly the primer is applied, the less sanding is necessary to achieve a smooth finish. Second, it is a high build material which fills many surface imperfections and effectively hides all the layers beneath it. Third, it sands easily. Begin with 240 grit sandpaper if necessary and proceed through 1000 grit before buffing. Finally, it is specially formulated to develop and maintain a highly polished finish. When sprayed correctly at 35-50 psi, the surfacing primer has very little porosity to interfere with the luster. A properly shaped plug covered in a coating of highly polished Duratec Gray Surfacing Primer is the perfect starting point for molding.
Developing a Class 'A' Plug Finish
Sand the plug surface and edges using 400 grit or finer wet/dry sandpaper. Follow the 400 grit with 600 and then 1000 grit. Remember to change the water and rinse the mold surface when switching to the finer paper, as minute sanding particles the size of the previous grit will otherwise remain on the surface. These particles will leave scratches coarser than the new paper is able to remove.
Wash, dry, and inspect the surface. If any scratches remain, back up and sand using the finest paper which will remove the texture.
When creating plugs, molds, and parts, applying a release agent is a critical step in the process. Mold releases act as a parting agent between layers of tooling gel coat and the plug surface. Mold releases also help to preserve the integrity of your plug and avoid damage to both the plug and the mold surfaces. The effort required to apply a quality release agent during preparation far outweighs the hours spent correcting damage later.
Fibre Glast recommends the use of #1016-A Parting Wax and #13 PVA to produce a tough, durable, high-gloss surface. When applying to a new plug surface, follow the steps outlined below:
- Use a clean dry cloth or applicator pad to apply a thin even coat of Parting Wax to mold surface.
- If buffing by hand, apply to a small section and begin buffing within one minute of application. A power buffer equipped with a terry cloth or lamb's wool pad will reduce labor time on larger surfaces. Keep power buffer moving constantly so as not to allow build-up of friction that could burn through the wax coating. Surface should be buffed to a glossy finish.
- In order to insure complete coverage, repeat application and polishing process at least three times when initializing new or reconditioned plugs.
- Allow one hour for solvents to evaporate, producing a tougher wax barrier.
PVA, or polyvinyl alcohol, should be used with our #1016-A Parting Wax for the easy release of the mold from the plug. Once the final layer of wax has dried, PVA should be applied with the following considerations:
- PVA can be brushed on, but for best results, apply with a spray gun, 12–18 inches away from substrate.
- Generally, apply in three layers: the first, a thin mist, allowing 10-15 minutes to dry completely. Then apply two heavier flow coats, allowing each to dry completely (30-45 minutes each).
- PVA should form a smooth, glossy surface that will not shrink or pull away from corners or curved surfaces.
Using an Existing Part as a Plug
A simpler option, if available, is to use an existing example of the part that is to be duplicated. This process eliminates the need to create the form itself and ensures a more precise reproduction. When using an existing part, it is still critical to ensure that you have a Class "A" fin sh on the plug. This will prevent the tooling gel coat from sticking to the plug and protect the plug (and your new mold) from damage.
- Inspect the plug for imperfections. Repair any imperfections with #4116/264-A Lightweight Polyester Cosmetic Filler and sand to a final finish.
- Prime plug with #1041 Duratec Gray Surfacing Primer.
- Sand to 1000 grit.
- Apply four total coats of #1016-A Parting Wax before initial use.
- Use a clean dry cloth or applicator pad to apply a thin even coat of Parting Wax to mold surface.
- If buffing by hand, apply to a small section and begin buffing within one minute of application. A power buffer equipped with a terry cloth or lamb's wool pad will reduce labor time on larger surfaces. Keep power buffer moving constantly so as not to allow build-up of friction that could burn through the wax coating. Surface should be buffed to a glossy finish.
- In order to insure complete coverage, repeat application and polishing process at least three times when initializing new or reconditioned plugs.
- Allow one hour for solvents to evaporate, producing a tougher wax barrier.
- Apply the thin mist coat of #13 PVA.
- Allow 10-15 minutes to dry completely.
- Apply two heavier flow coats, allowing each to dry completely (30-45 minutes each).
- Once the PVA is dry, the mold-making process can begin.
Conclusion
Starting with a good, properly prepared plug is critical for your mold-making, and eventually part-building, process. A properly prepared plug surface with a Class "A" finish will help ensure that your mold and subsequent parts will have durable, blemish-free surfaces. Fibre Glast offers all the materials that you will need to make your plug building project a success. For more information on plugs, molds, and the composite making process, please see our videos "Composite Mold Making", "How To Mold Fiberglass", and "Moldless Composite Construction" in the Learning Center section of our web site. Additional information can also be found in the "Moldless Composite Construction". As always, if you have any further questions regarding these products or processes, please contact us at 800-838-8984.


